Before you begin building your experiment, here's a quick reminder to reach out to info@terracotta.education if you have any questions!
We recommend using the Chrome browser to all Terracotta users (including students). Terracotta also works in Safari and Firefox when set to allow "cross-site tracking cookies." Want to know more? Click here!
As you get started, here are a few things to have on hand:
- An experiment title and description
- A PDF of the experiment’s Informed Consent statement (must be smaller than 10MB)
- Different versions of each assignment for each experimental condition
- A calendar with the open, due, and close dates for each assignment
Please note that you can only make changes to your experiment (this includes adding new assignments) before you begin collecting data. This includes Informed Consent data, so please only publish your first assignment (Informed Consent or other) to the LMS once you have created all the Terracotta Assignments you will need for your experiment.
Table of Contents
Experiment Design
Terracotta will walk you through setting up your experiments. Begin by clicking Terracotta in the left navigation bar of your Canvas course site, and then click "Create your first experiment."

Then, give your experiment a descriptive title (i.e., “My First Terracotta Experiment” or “Nudging Interventions in High School Math”) and click Next.

Describe your experiment to give you a way to differentiate it from others and click Next.

Name your conditions (any experiment is an attempt to determine the difference between 2 different conditions. In this one, we’re going to try to determine the effects of a growth mindset intervention). Click Next.

Now decide how you would like participants to be exposed to those conditions. Choosing “one condition” means that participants will be exposed to one condition (in this example, either “Growth Mindset” or “Control”). Choosing “all conditions” means that all participants will be exposed to both conditions (in this example, both “Growth Mindset” and “Control”), and you will have to create at least two assignments in order to balance the experiment.
Make your choice, then click Select.

Then choose your default condition (this should be the condition that is closest to the classroom’s normal instructional practice). Click Next.

Now you’ve completed the first part of experiment set-up! Click Continue to Next Section.
Informed Consent
Create your Informed Consent assignment and upload your PDF. Terracotta automatically gives students 100% completion credit on this assignment, but you can change the point value in your Canvas settings.
Click Continue.

You have three participation options:
- Students will be invited to consent - this option will create a consent assignment within Canvas.
- Teacher will manually decide - this option allows teachers to opt minor students in after collecting parental consent.
- Automatically include all students - this option requires no consent.

Once you have made your choice, click Select.
Click Continue, and we’ll walk through the process of setting up a consent assignment.
Give your assignment a title, then click Next.

Upload your Informed Consent PDF (smaller than 10MB), then click Next. Note that Terracotta offers a link to download an informed consent template if you’re not familiar with their contents.

Now decide how you’d like your participants distributed. You have three options:
- Even - this option will distribute consenting students across all conditions. Note: if you have chosen “All Conditions,” even distribution will be your only option.
- Custom - this option lets you choose the percent of participants distributed to each condition
- Manual - this option allows you to choose the students distributed to each condition(s)
Once you've made your choice, click Select.

Great work! You set up your Participation process! Now click Continue to Components.
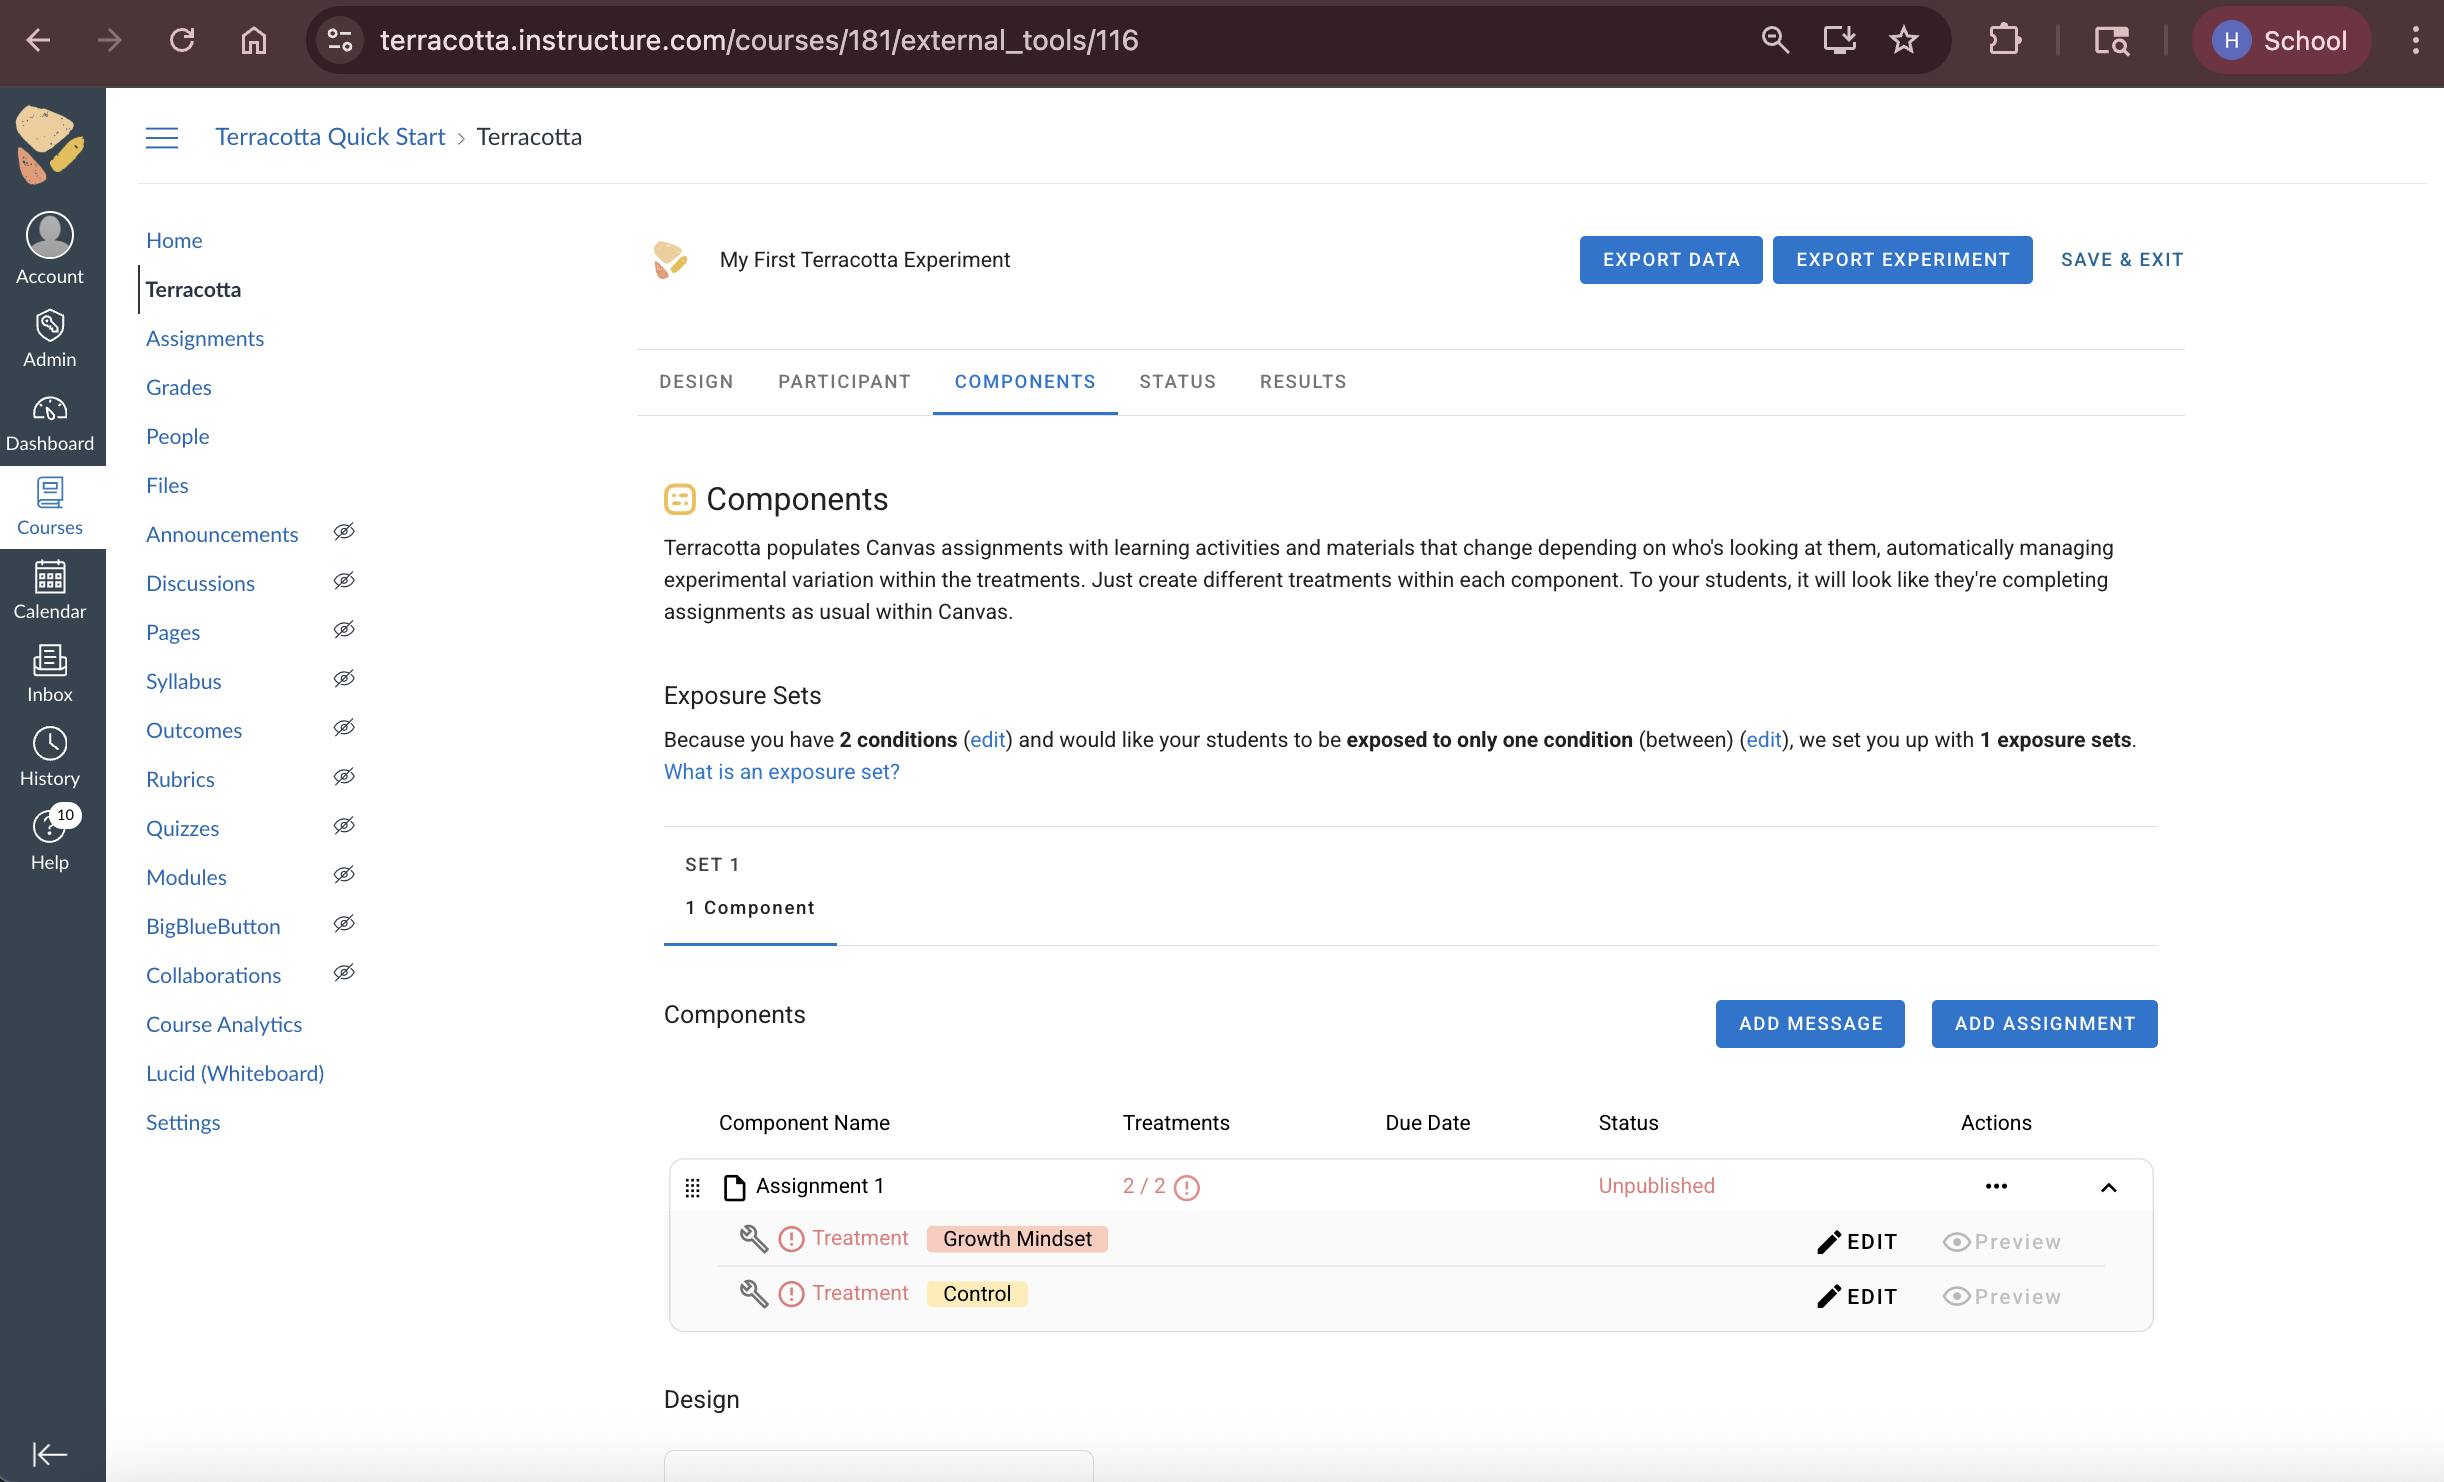
Components
In the Components section, you have the option of creating assignments or messages. We'll create assignments here; if you're interested in Terracotta Messages, check out this knowledge base article. Click Create Assignment.

Decide if you want to create an assignment with one version (i.e., for a survey that you want everyone to take), or an assignment with different versions. We'll walk through different versions here.

Give your first assignment a title. This title will appear in Canvas, and your students will see it once you publish the assignment. You also have the option to opt into and out of assignment-level settings here. Click Save & Close when you're ready to proceed.

On the next page, you'll see tabs for each part of your experiment. Scroll down to see your assignment and treatments, and click Edit for the version you'd like to create first.
Add instructions (these will show in Canvas), then choose Add Treatment. We'll work with the Terracotta Builder in this guide; if you're interested in External Integrations, check out the knowledge base article for Qualtrics or for custom web activities.

Click Add Question to reveal the types of questions you can add. For this example, we’ll use short answer.
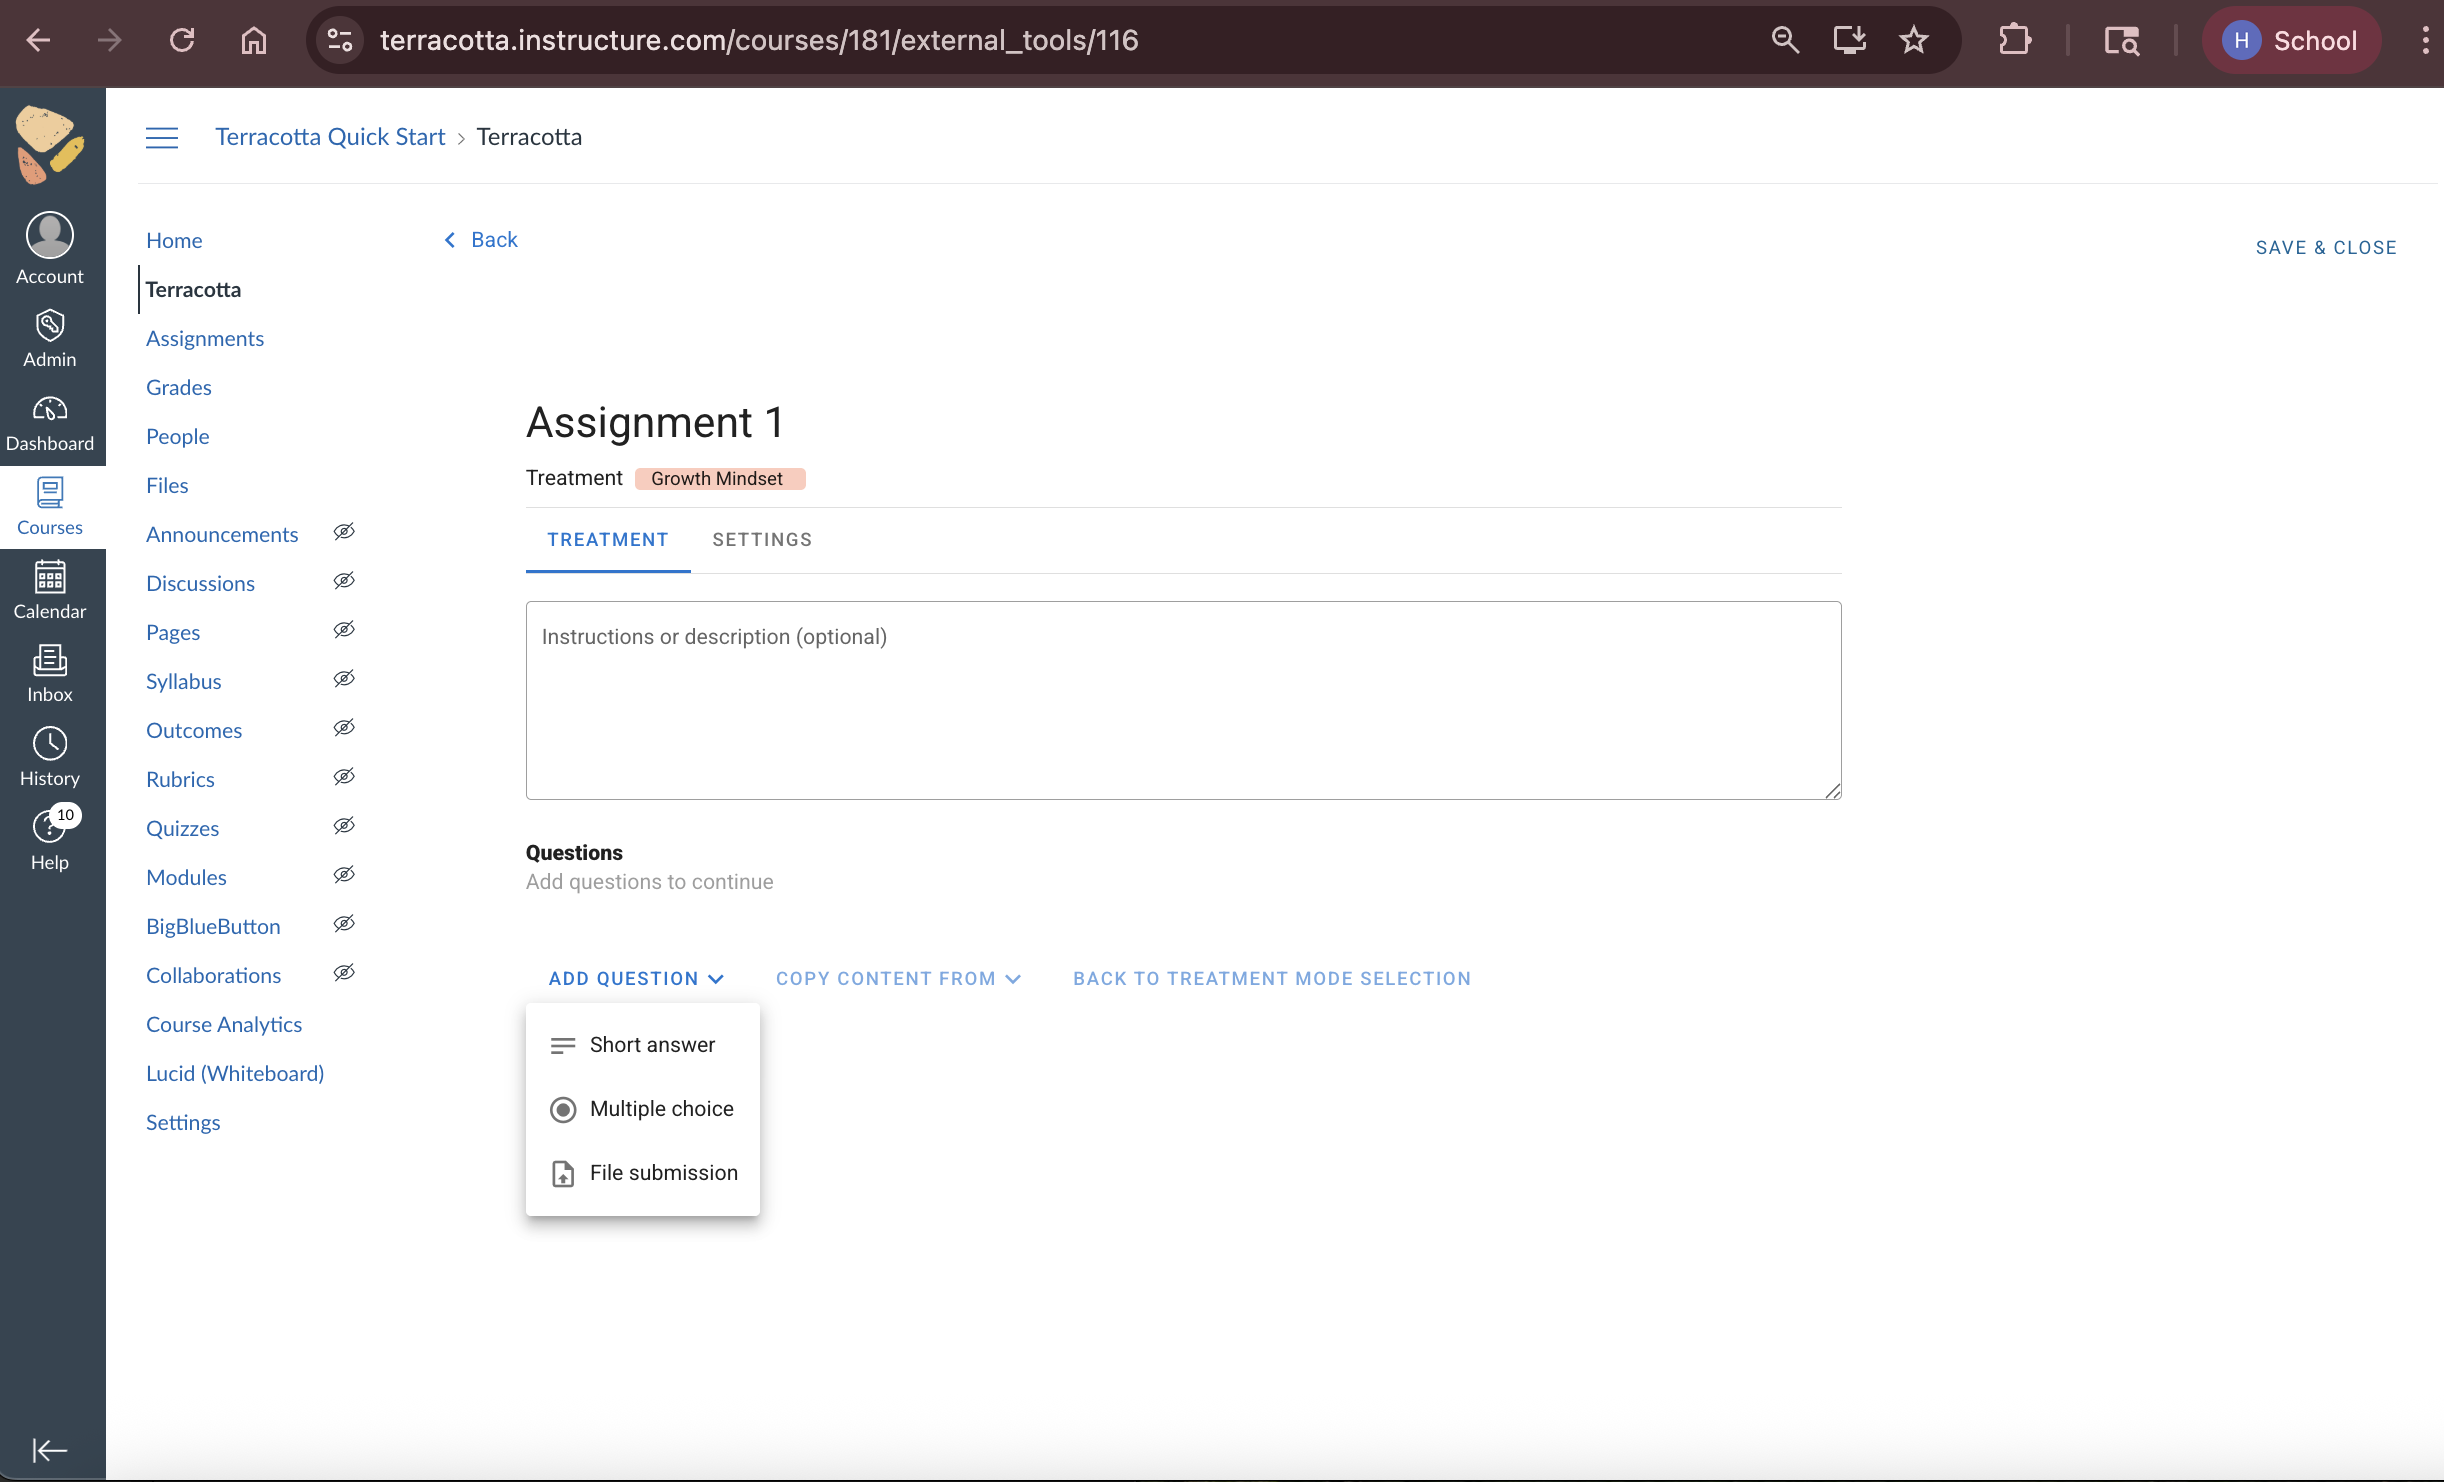
We'll use one short answer question in each treatment, but you can add others by clicking Add Question.

Populate the question field and point value. Note: questions can be worth 0 points while still giving students credit for completing the assignment.

You can add a video to your question by copying the embed code from YouTube, clicking the YouTube button in the question editor, and pasting the code into the field provided. Click Add.

When you're done, click Save & Close. To create the control version, click Edit, and repeat the process. Though Terracotta has created the assignments within the LMS, the instructor must still publish the assignments and set up any settings specific to their LMS grade book.
When the experiment is balanced, it will look like this:

Once you've published your assignments, you're ready to start your experiment. Please note that if you're using an Informed Consent assignment, it's best to set that assignment to open and close before your first Terracotta assignment opens.
Student Experience
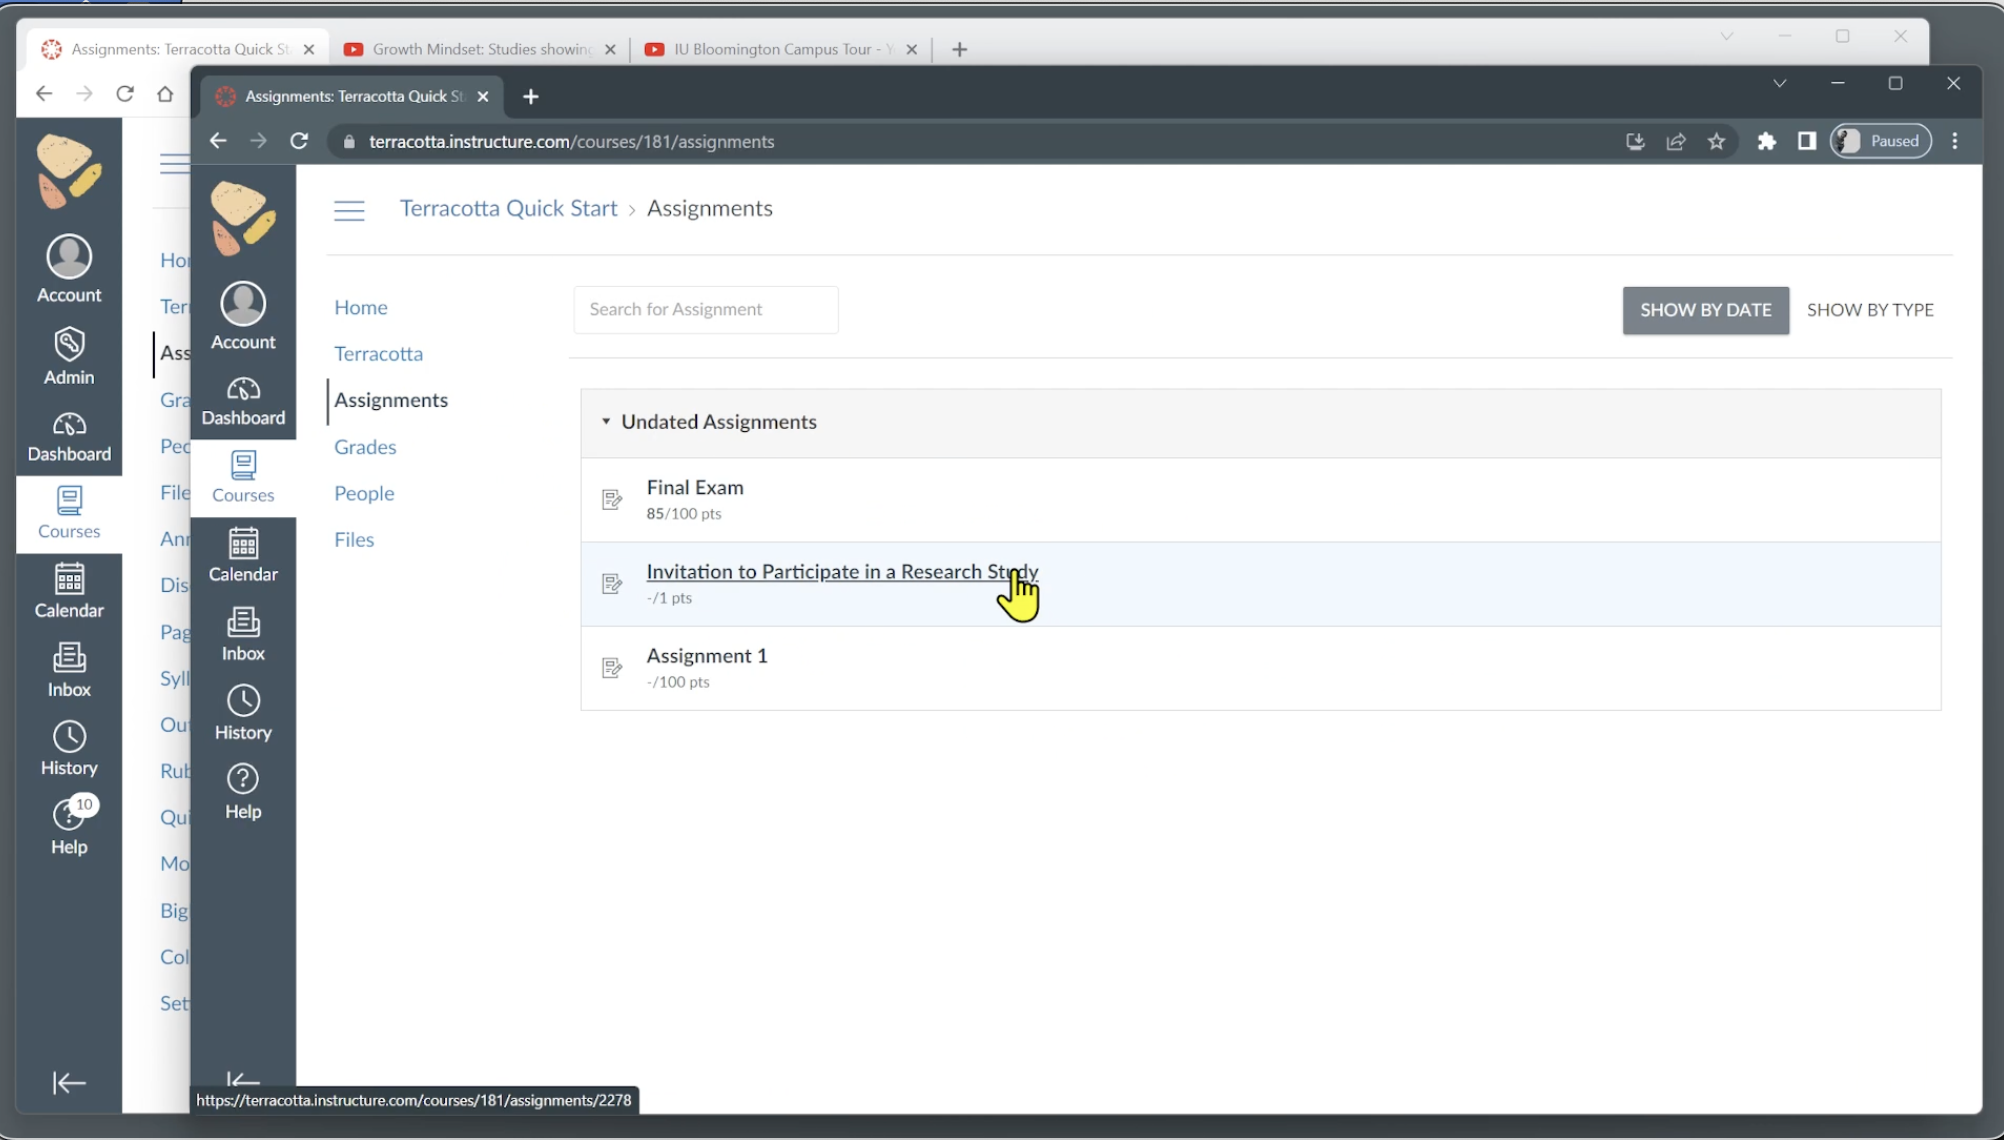
To students, Terracotta assignments look like any other Canvas assignments in that they appear in assignment and grades lists alongside all their class assignments. We’ll go through the flow of the assignments created in the section above so you can see what they look like from the student perspective.
Informed Consent
After opening the Informed Consent assignment, your student will see a screen containing instructions and the document.

The student scrolls to read the document, and is then asked to agree or not agree to participate in the experiment.
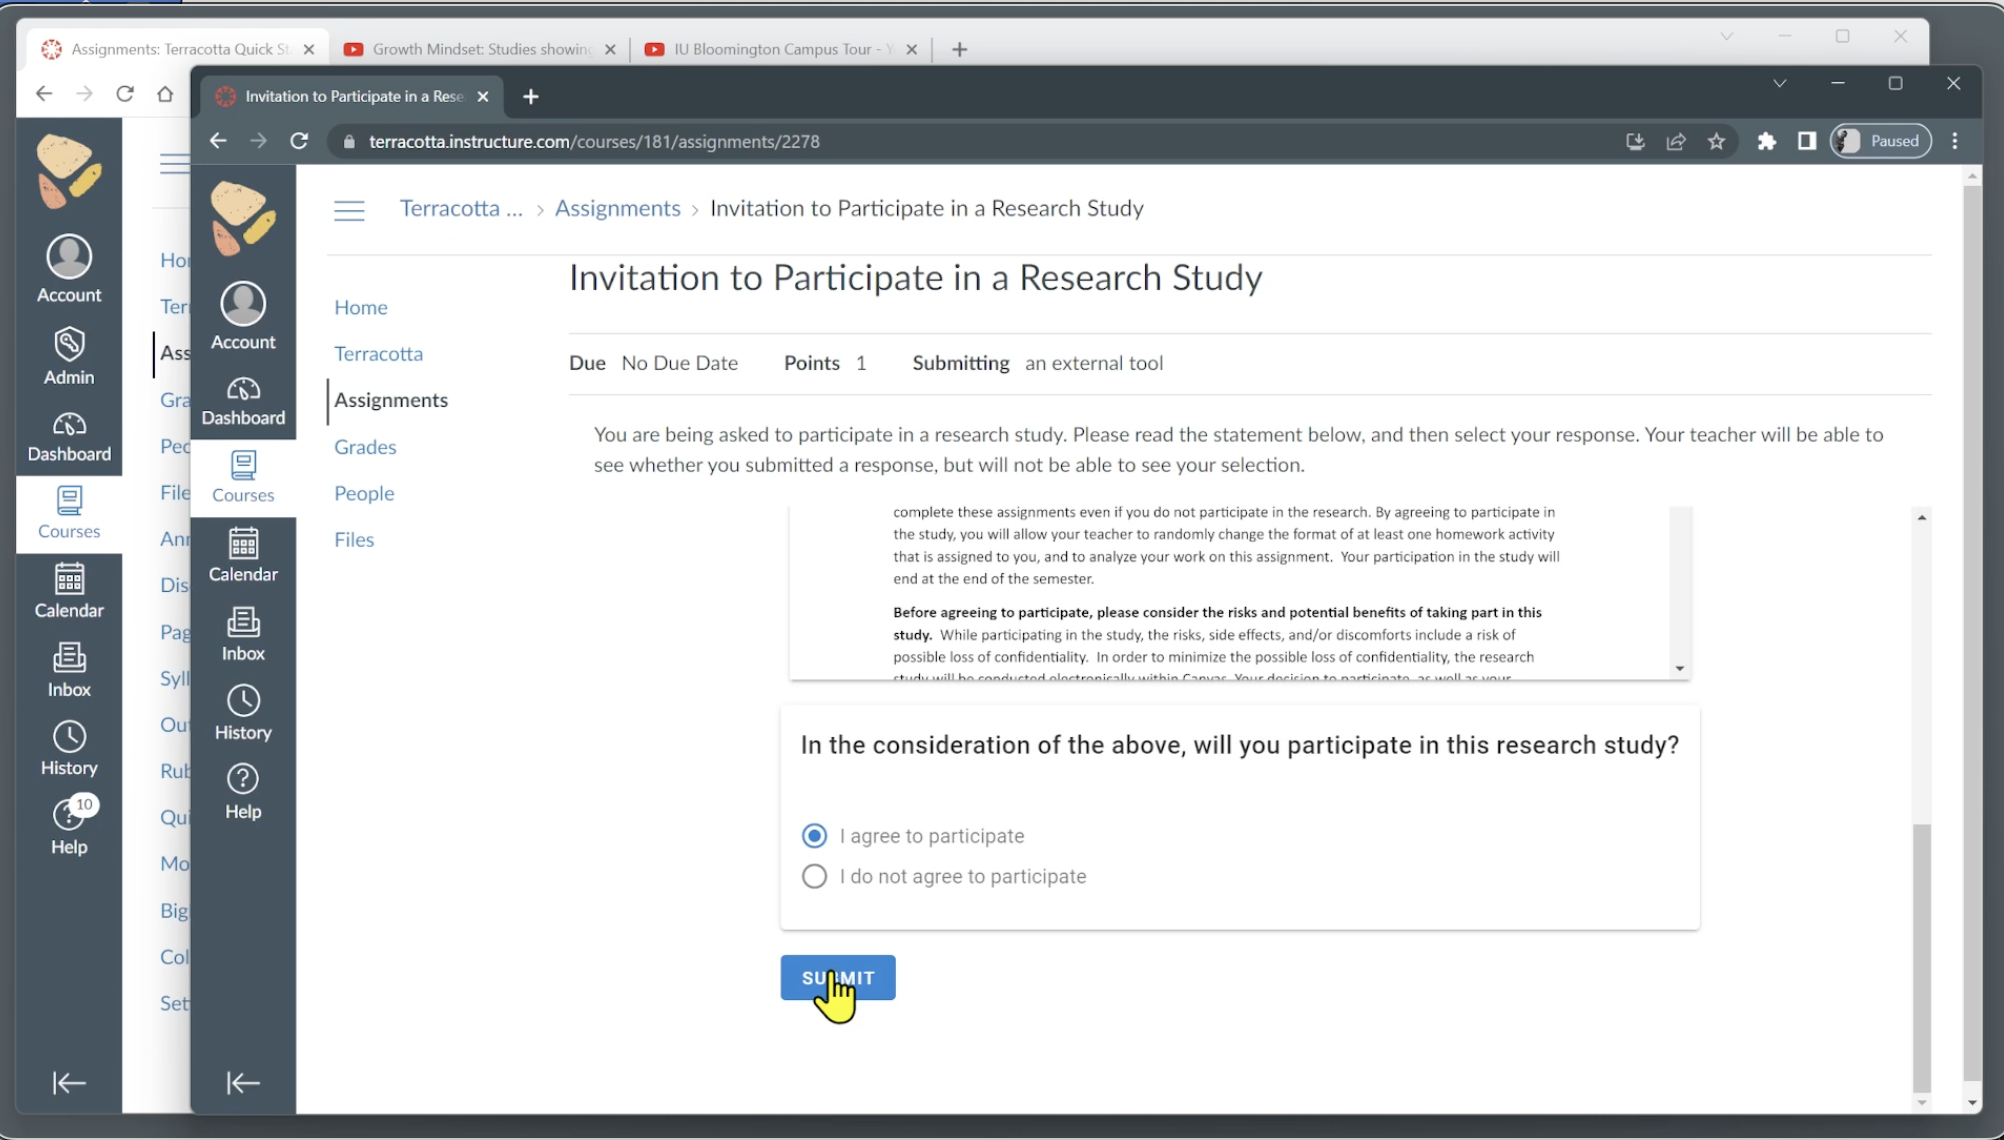
Students who agree become part of the study; students who do not are placed in the “business as usual” condition, and their data will not be included in any exports (this guide shows the flow when students agree). When the students click submit, they will see a confirmation screen.

Note: After the student has submitted an assignment, even if it does not require manual grading, it will appear as “Not Yet Graded” until the instructor releases the grade in Canvas. Once you release the grade, students who have completed it will receive full credit regardless of their responses.
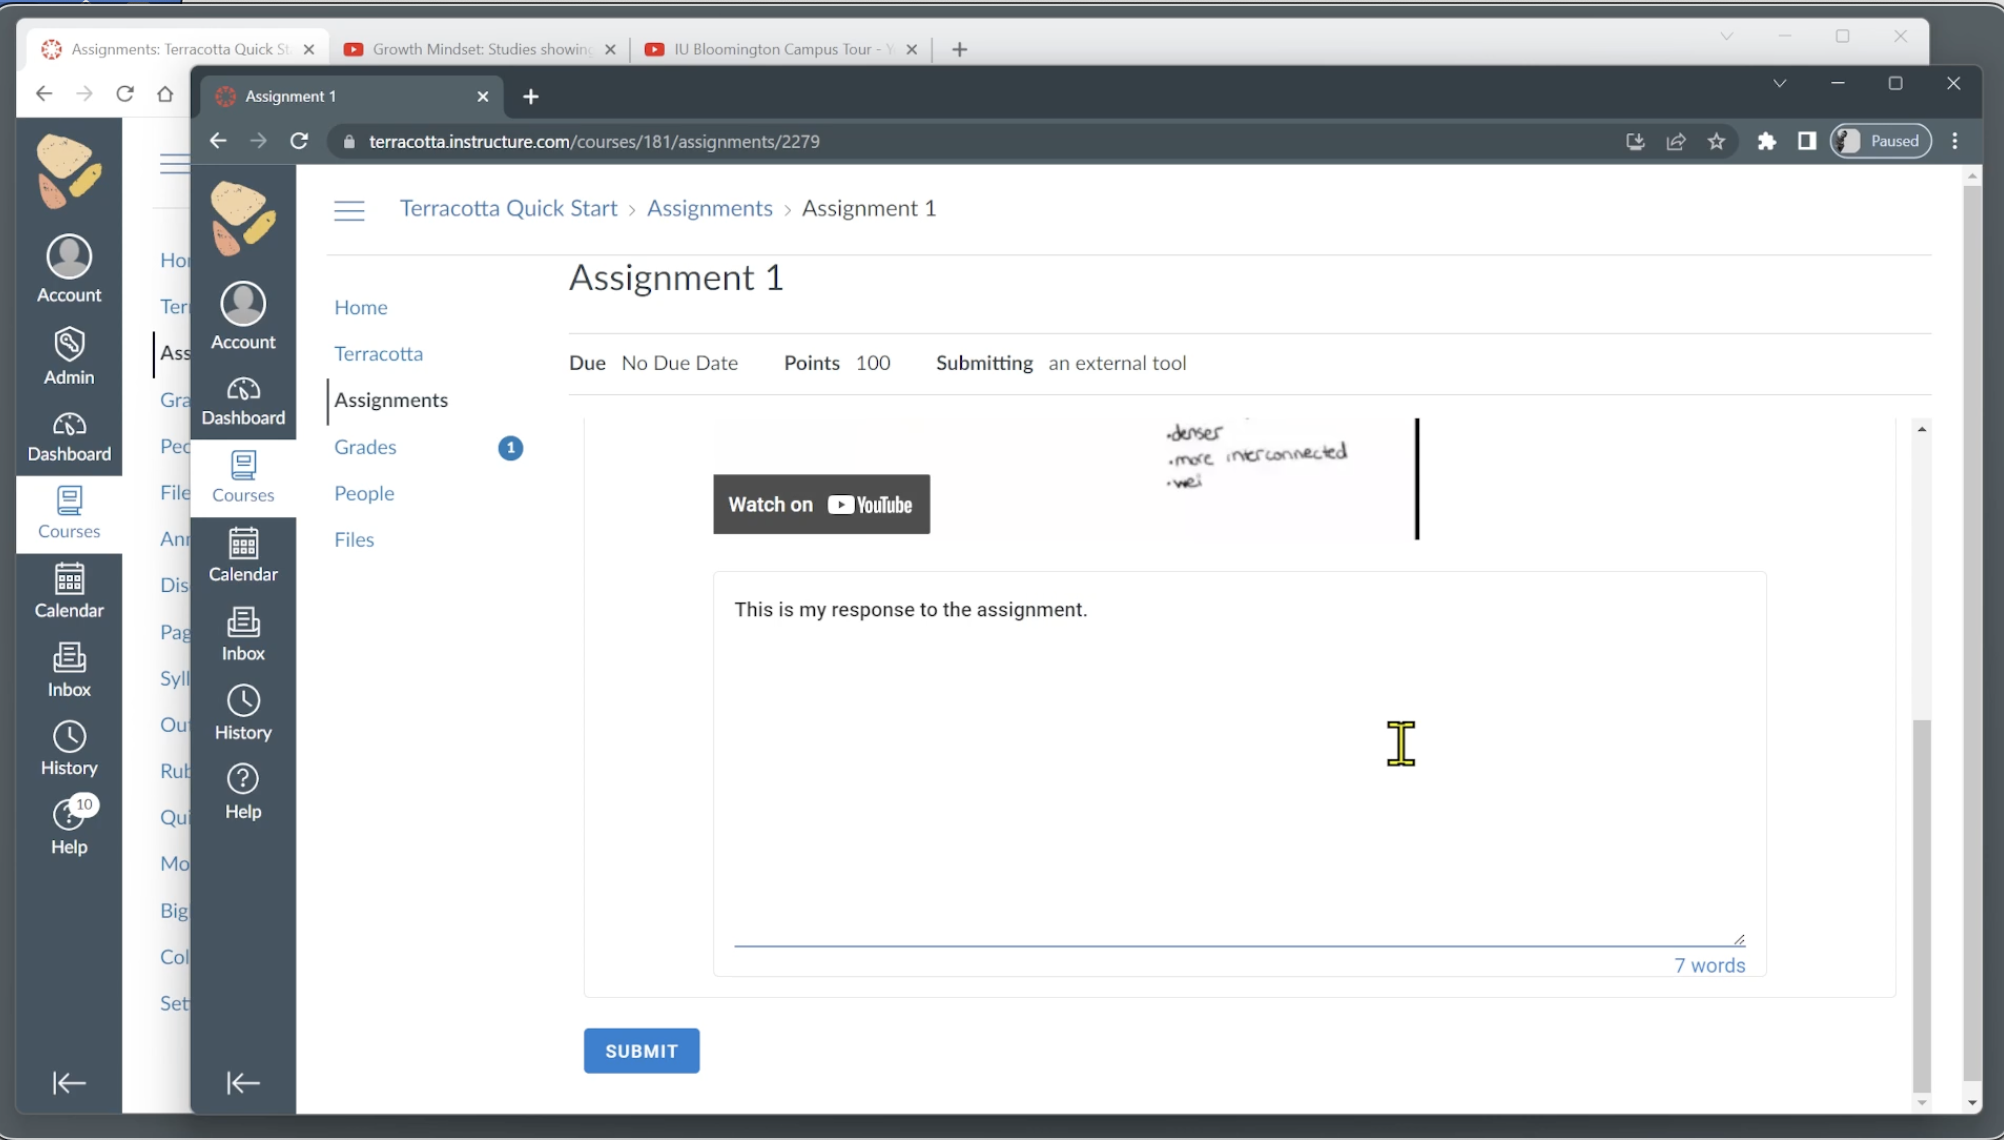
Assignments
The student opens the assignment, answers the questions, and clicks submit.
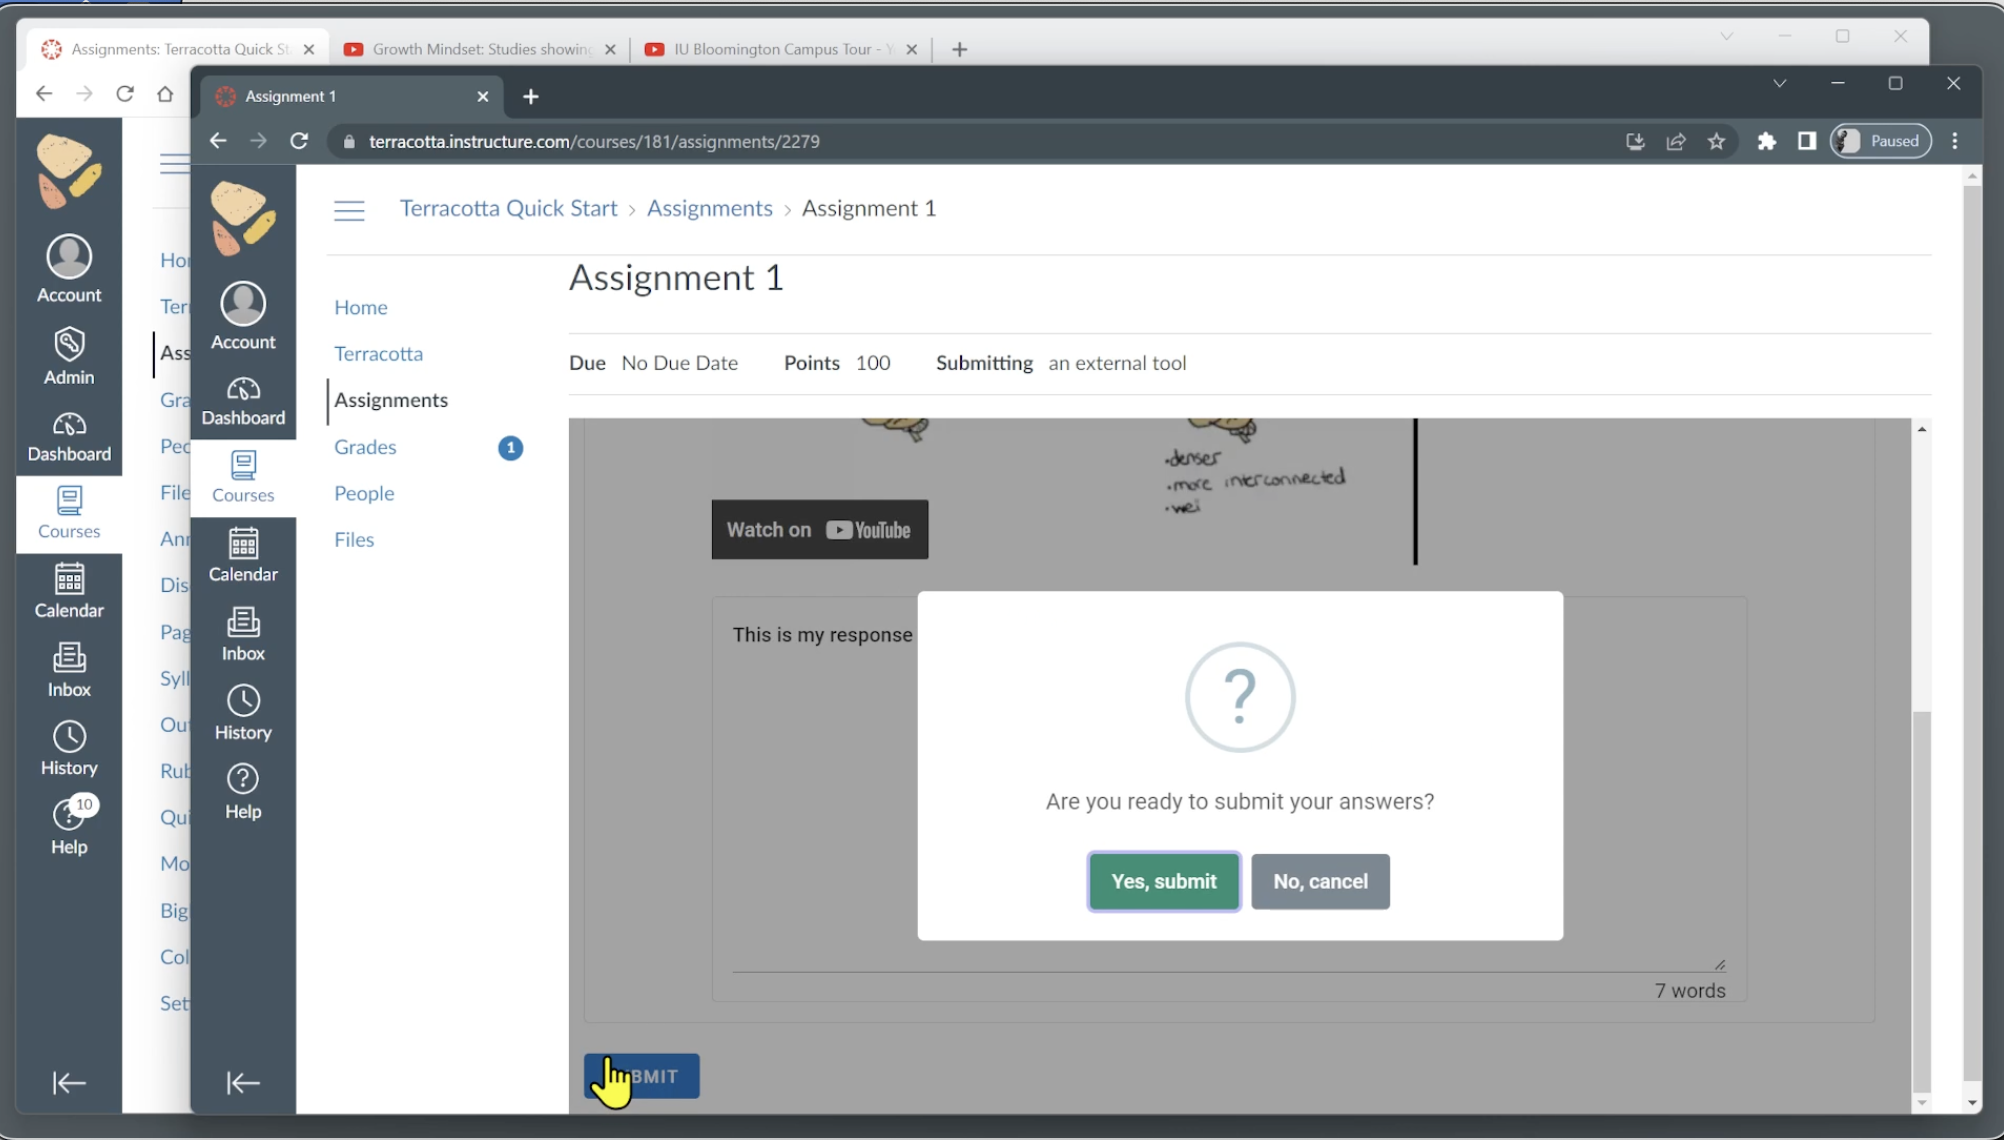
Terracotta will ask if the student is ready to submit the assignment, and the student will have the option to confirm, or to cancel and go back. Once the student confirms, Terracotta also confirms submission.
As with any other Canvas assignment, the instructor will need to release the grades before the student can see them.
Adding Outcomes
Once your students have completed the assignment, you can add outcomes to your experiment. Start by navigating to your experiment’s Status tab, which shows the different parts of your experiment (including Informed Consent, if applicable).

Click into the exposure in which you’d like to add the outcome, then click Add Outcome. Either select a gradebook item or add scores manually.

To select an item from your gradebook, choose that option, and then check the box (or boxes) for the items you’d like to add. When you’re done, click Save & Exit in the top right corner.

To verify that your items have been added as outcome measures, open the Status tab; you should see the item listed below the Outcomes header.
To enter scores manually, choose that option, and give the outcome a name in the next screen.
This option is useful for entering participants’ demographic information, like their status as major or nonmajor in the course’s subject matter, or their year in the program.
Once your experiment is complete and you’ve added all your outcome measures, it’s time to export your data.
Exporting and Analyzing Data
Exporting your data
When you’re ready to export your data, open your experiment in Terracotta and click the blue Export Data button in the upper right hand corner.

When the download is ready, you'll see a green message bar at the top of the screen. Click to download a zip file to your computer.

This will download a zip file containing several csv files to your computer.
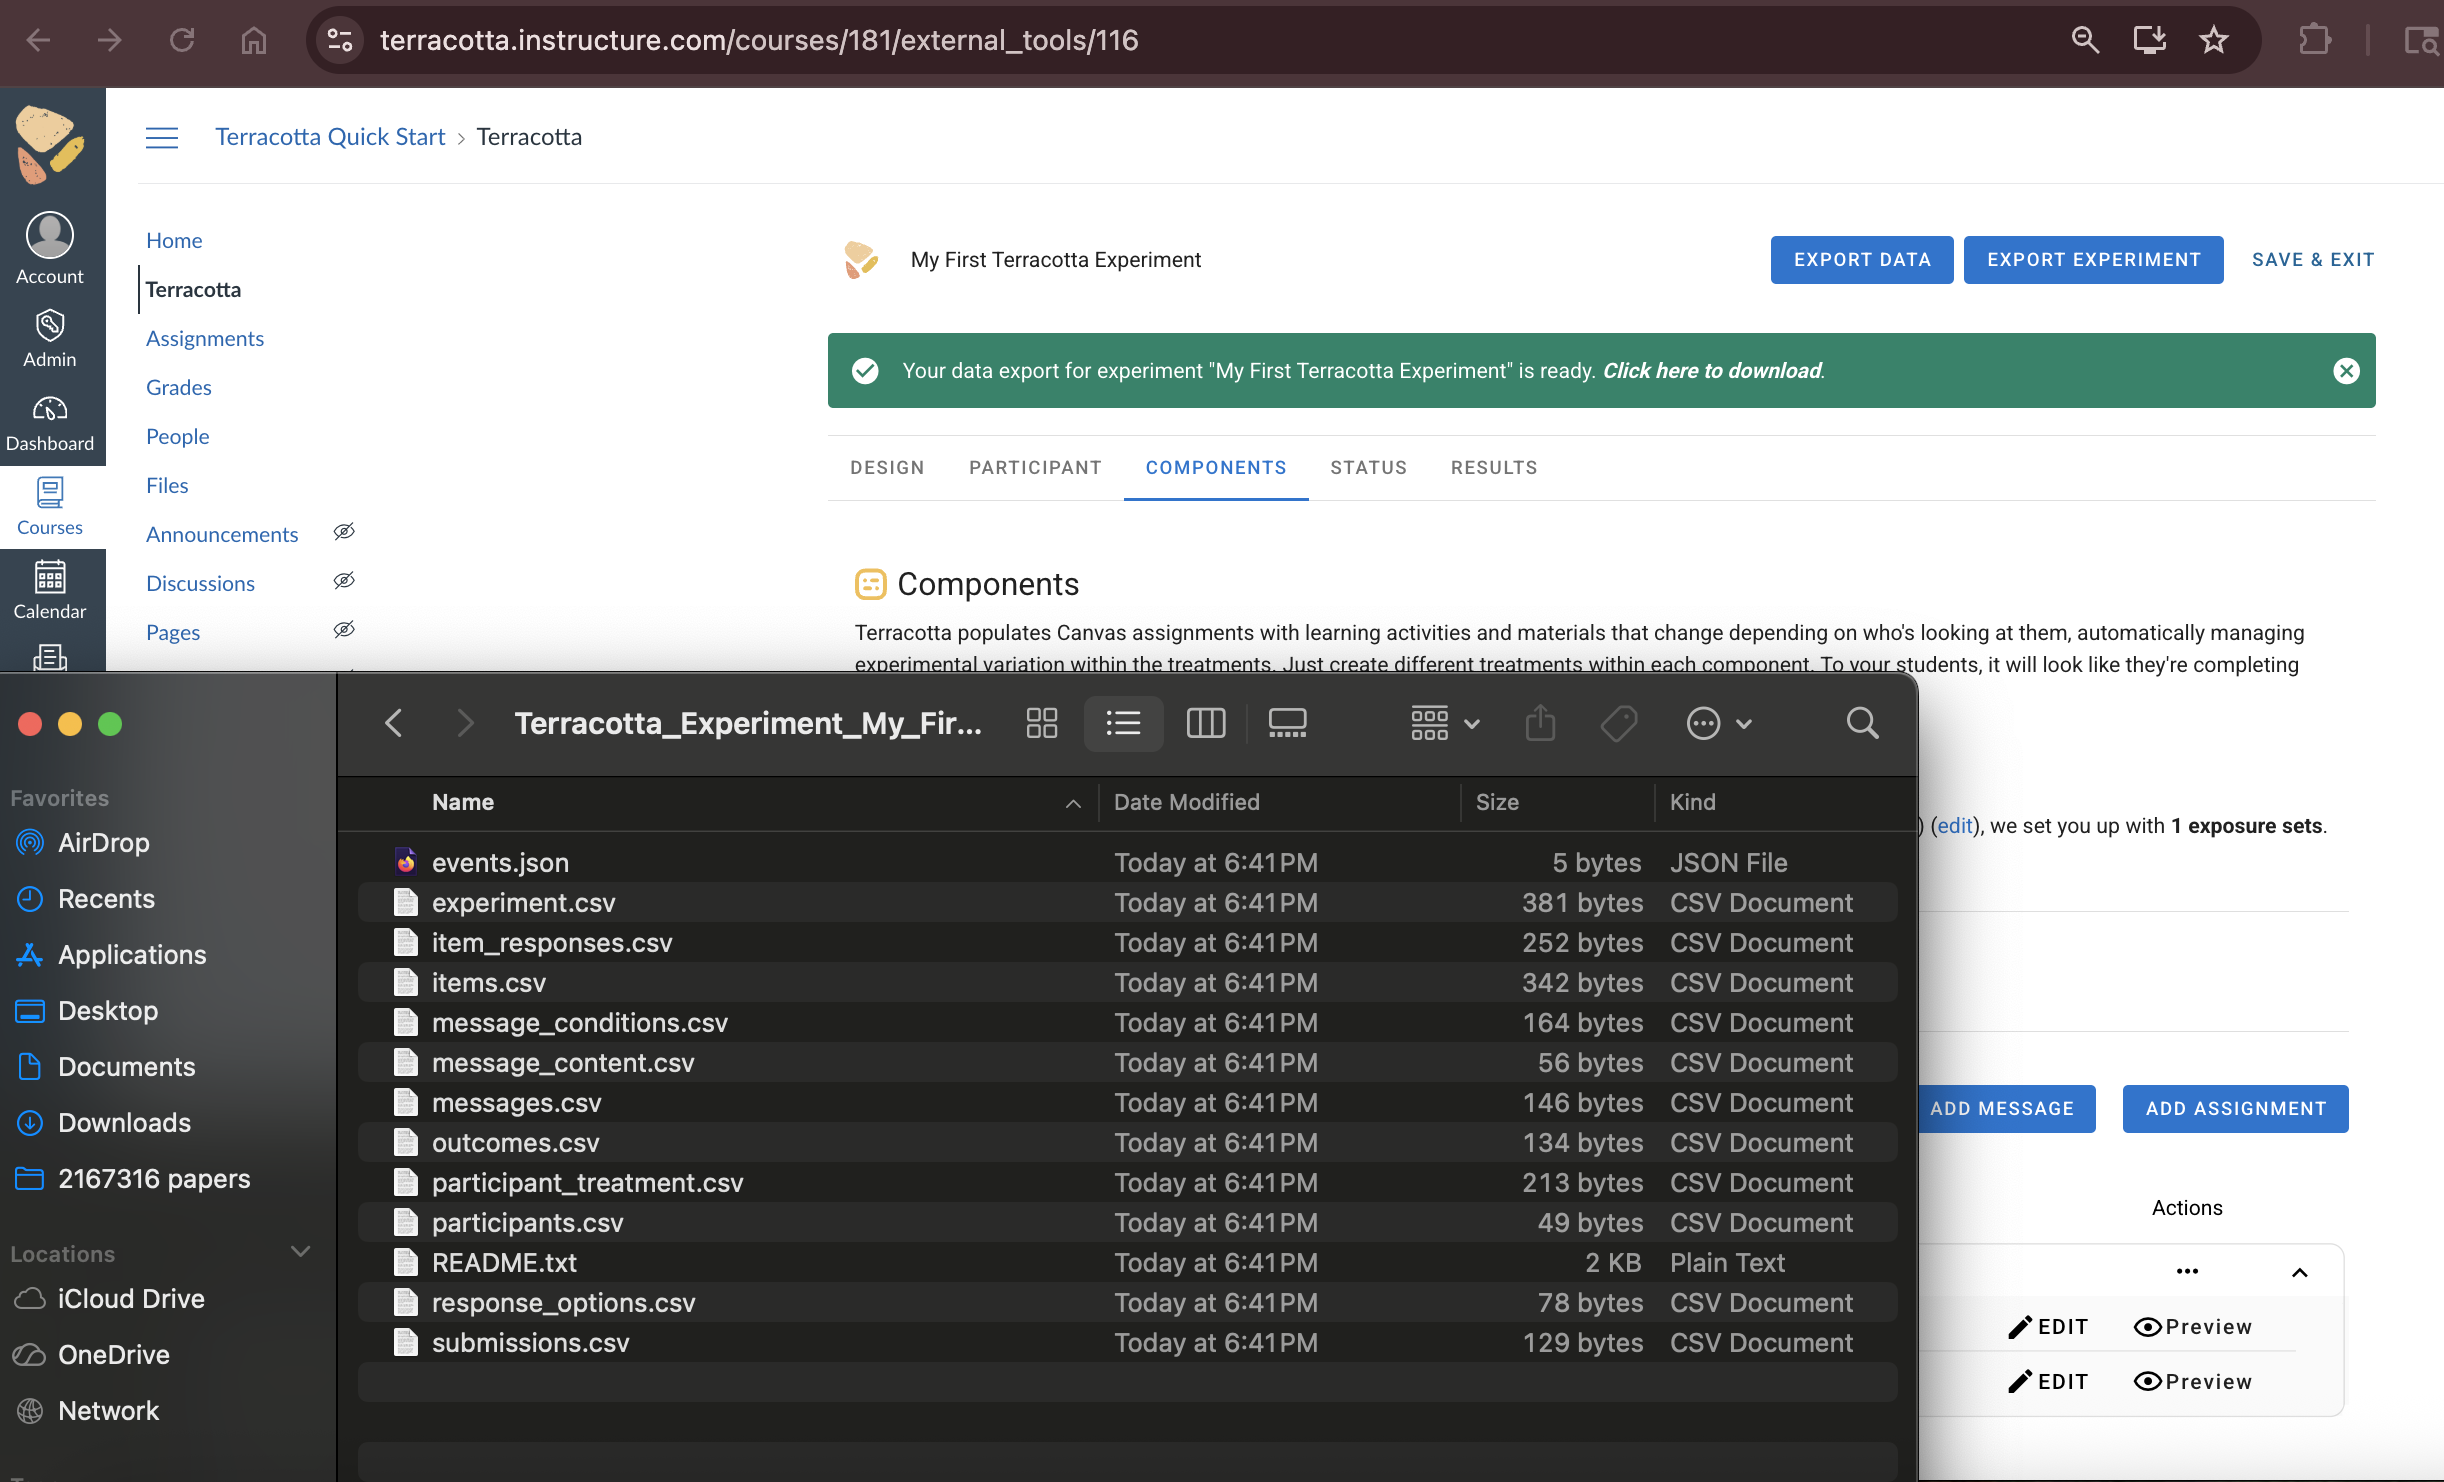
These csv files and their contents are explained in the Data Dictionary on Terracotta’s website. Download an example of this export here.
Analyzing your data
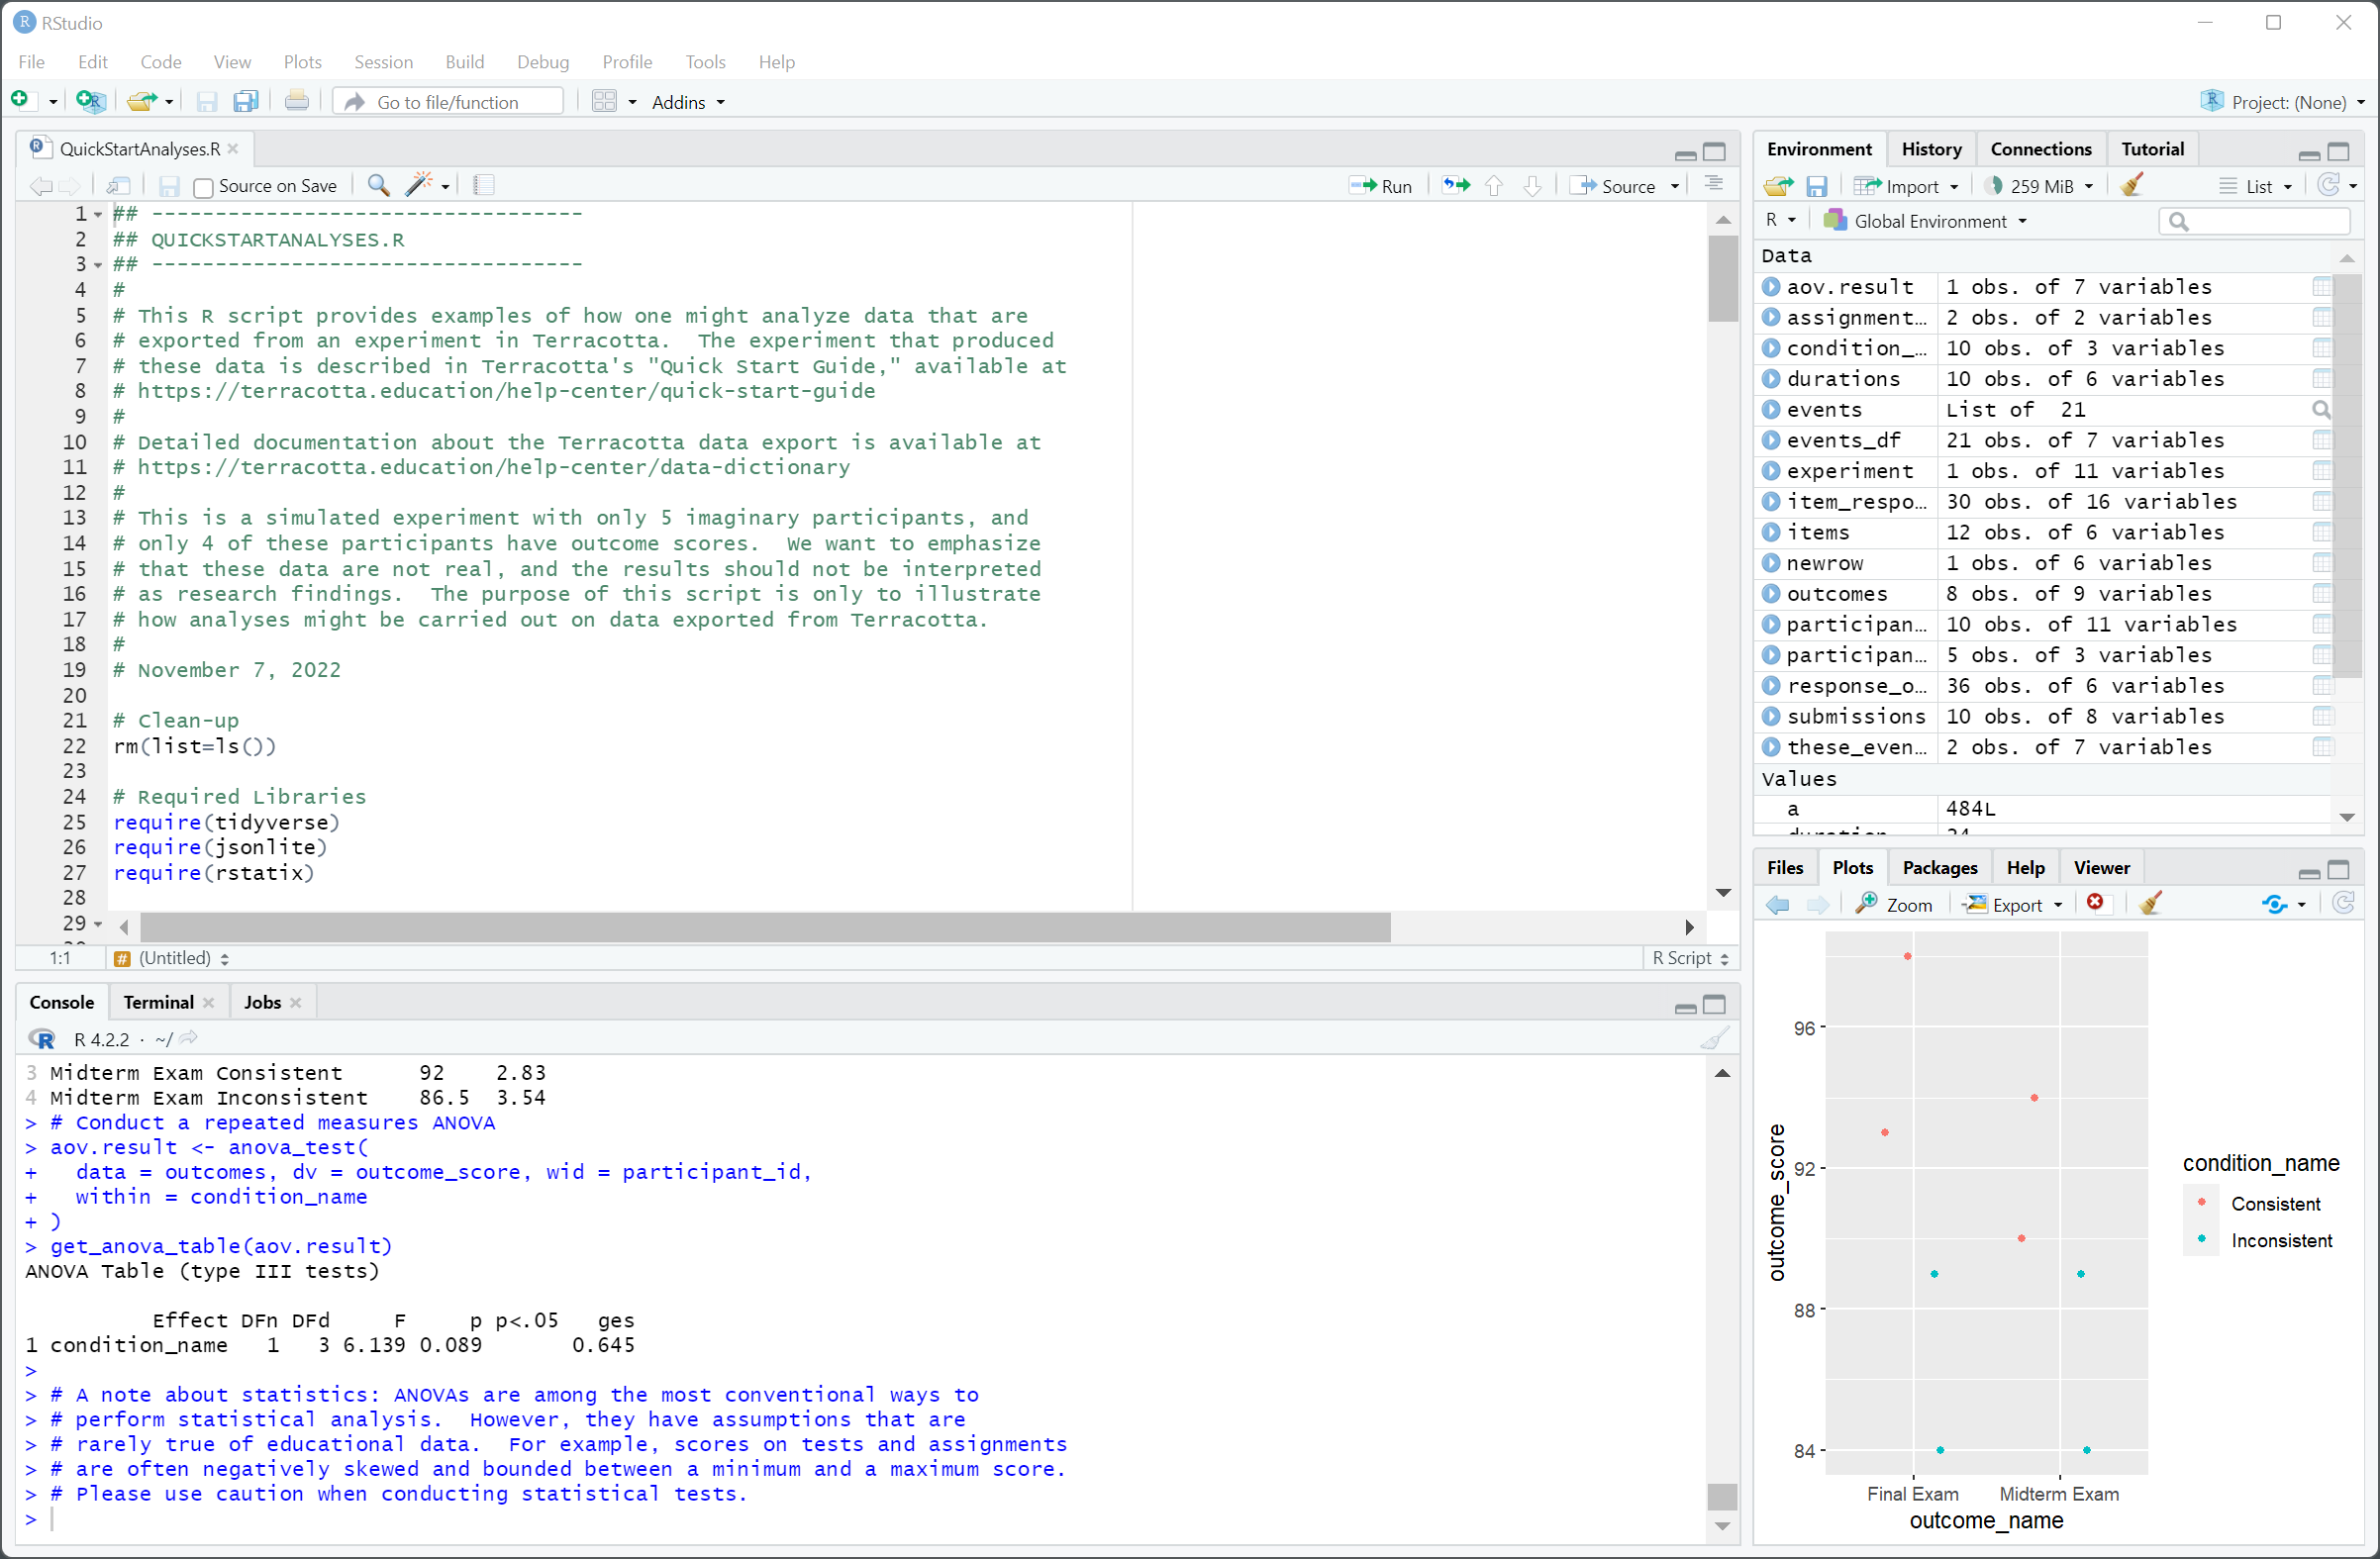
Once you've downloaded the data from Terracotta, it's time to analyze your findings. Here is an R script that provides some examples of how one might analyze the data exported from an experiment in Terracotta.